The Friends & Family feature allows the lead of a group to perform several actions on behalf of the members of the group, like ordering some tickets, paying reservations, etc. It also allows the group lead to see some information about the group members like emails, or previous orders. In order to increase protection of data privacy, an explicit consent has been implemented, preventing group leads from accessing some data of the group members.
Solution
Solution overview
The solution consists in two parts described in more detail in the next sections:
- Reduce the rights of the group lead towards group members who didn't give their explicit consent
- Provide a process to allow a group member to provide the consent to the group lead so that he can benefit from the full Friends & Family features
Reduced access rights in absence of consent
This section describes the restrictions that are applied until the group member has given his consent. All Ticket Shop pages not mentioned here behave the same way with or without consent.
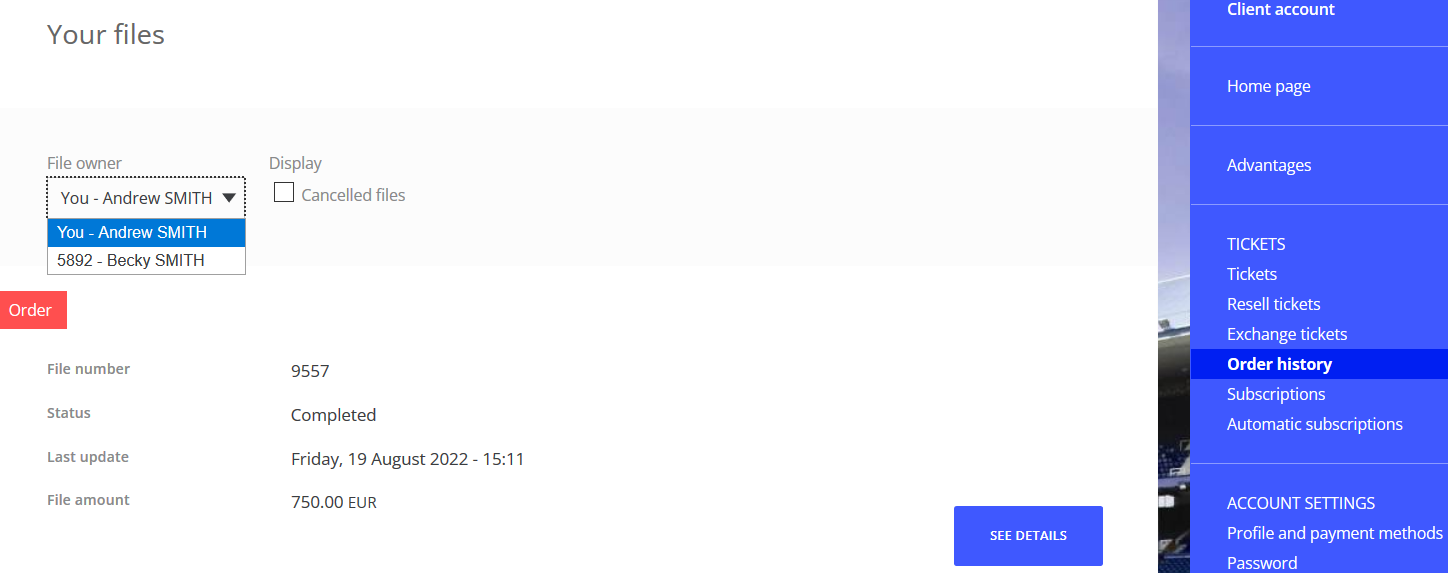
In the example below, Andrew Smith is buying three season tickets, one for him, one for Blaise Smith and one for Darren Smith. Andrew has just added Blaise and Darren to his group by entering their contact number and family name (this process hasn't changed). Since Blaise and Darren haven't given their consent yet to Andrew to be added to his group, Andrew can't see their email address.

In the ticket list, the group lead can only select the group members who have given their consent. As a result, Blaise and Darren don't appear in the list.

The same logic applies to the order history section:
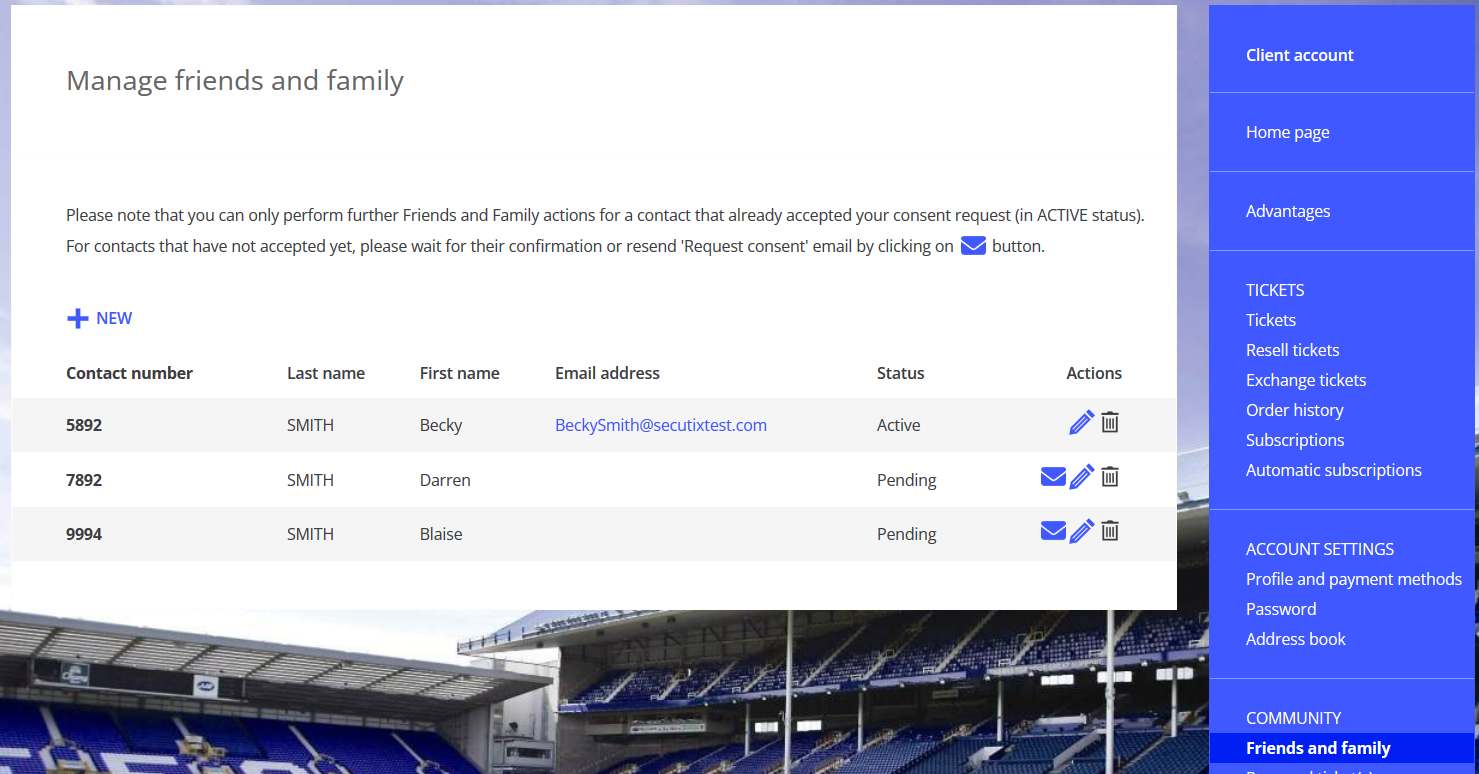
The email addresses aren't displayed on the Friends & Family management screen:
Providing the consent
When the group lead adds a contact to his group, the contact will receive an email with a link allowing to provide the consent. The email also mentions the name of the group lead who wants to add the contact to his group as well as a link to your privacy policy that has to explain the Friends and Family feature (so that the contact knows to what he consents).

If the group member doesn't react, the group lead may resend a consent request email explicitly by clicking on the email icon:
The Active status shows that the group member has already given his consent. The Pending status shows that no consent has been given yet.
Adding a new contact to the Friends & Family group
When a group lead adds a member to his group that doesn't exist yet, the newly created contact will receive two emails:
- An email to set the password
- An email requesting the consent to be added to the group
Note that a contact that doesn't have an email address can't give his consent (but a contact that has an email address but no internet account can). In the longer term, the idea would be to set the consent automatically for the children (in the legal sense of the word) of the lead of the group, since this should be the main business case.
Managing the Friends & Family groups from the back-office
An operator can see the members of a group in the Connections menu of the contact detail. He can also send the request consent email to a given member of a group.

Getting started
Enable the feature
The consent feature may be enabled separately for each organization in screen below:

Handling of existing Friends & Family groups
By default, SecuTix will set all the connections created prior to this new feature consent in an active state, meaning that the group leads will have the same full access rights as before. However, you can ask SecuTix to set all these connections in a pending state, meaning that the group leads will have to request the consent according to the providing consent section above. This solution is preferable from a GDPR point of view. However, you should inform your regular customers about this change because of its impact.
Customise the request consent email
The email sent belongs to the document type and class Request contact connection consent. If you want to customise this email, we recommend you to first download the standard template provided, modify this template and upload it again.