If you are using a physical configuration "with seat map" ou you will need a hall plan.
This can
...
The seat map can be created in the menu Institution → Venue → Seat map editor
Creation of a seating plan
Preparation
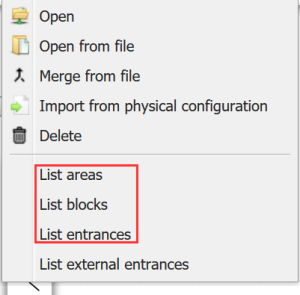
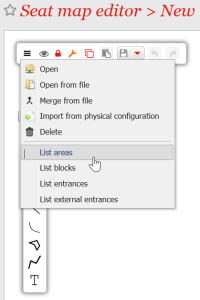
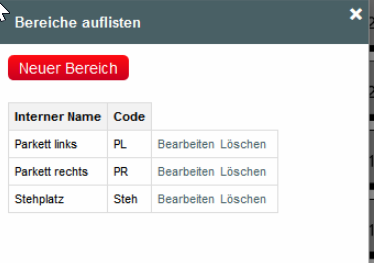
You will need 3 elements that will be asigned in the course of the creation of the seat plan.Yyou You can create the elements under the respective points and display them later via deht the so-called "Burger" menu.
- Area
- Block (optional) → The use of blocks is only recommended in stadiums / halls with <10,000 seats.
- Entrance

...
Construct
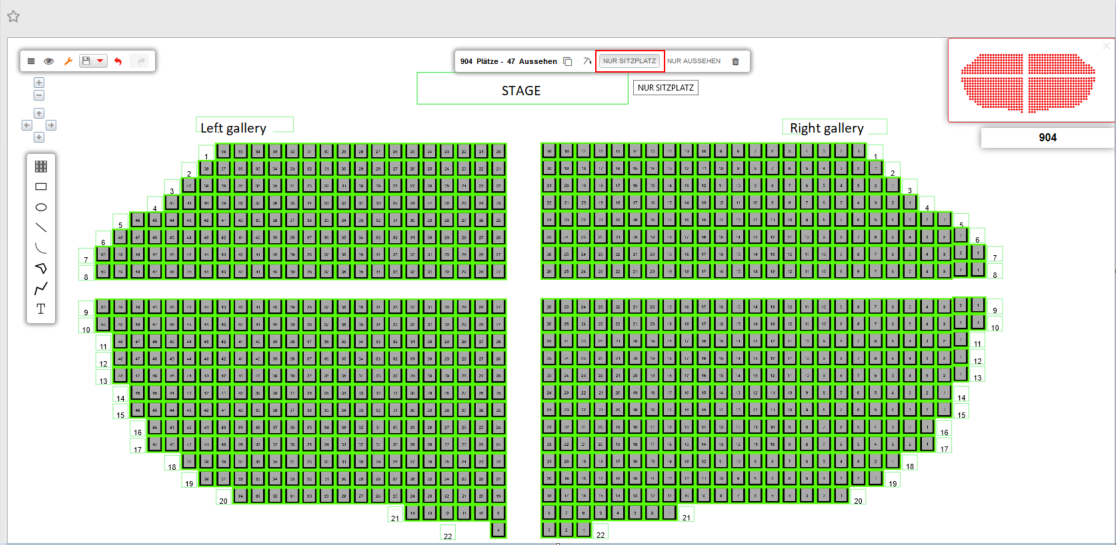
By opening the menu Institution → Venue→ Seat map editor you will start with a white screen. On the left side of the screen ther is a menu with drawing elements.
There you select the first menu item "Insert a Seat" and create a number of chairs. It is generally advisable to create too many chairs and to subsequently edit or delete individual rows in the seating tool (3).Es empfiehlt sich, zunächst tendenziell zu viele Stühle anzulegen und einzelne Reihen nachträglich im Sitzplatz-Tool (3) nachträglich zu bearbeiten bzw. zu löschen.
Screenshot: Initial Setting:


Editing seats
The seats can be selected and edited by repainting (???) or pressing Ctrl +A. It is also possible to select "seats only" form the editing menu.
Strg + A → "Nur Sitzplätze" markiert alle Sitzplätze.A → "Seats only" marks all seats.

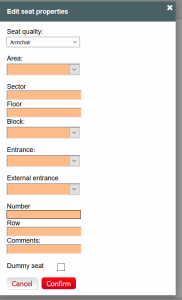
Select the seats to be edited and click on the left pencil in the upper menu bar.


The Edit menu opens. Assign the previously created information to your seats:

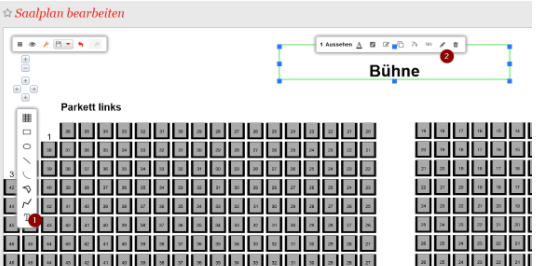
There are various functions in the menu on the left side that can be used to add graphic elements or text to the seat map. To write a text select the text function (1), confirm it with enter and place it.
To edit the elements, select them and use the edit functions (2).

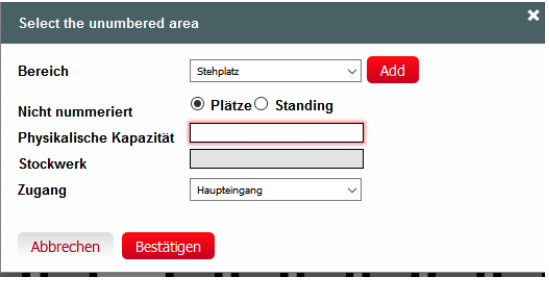
Adding standing room
- Adding "standing room"

2. after successful installation
...
3.Adding a graphic element to the
...
hall plan (e.g. rectangle)
...
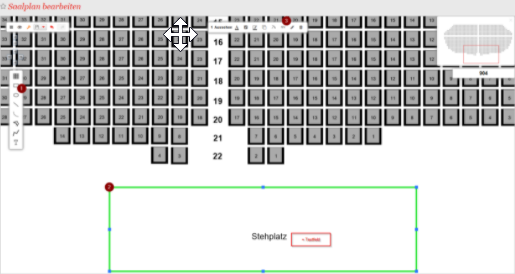
4. Definition of the graphic element as a standing or seated area with free choice of seats
 alidation
...
of the seat map
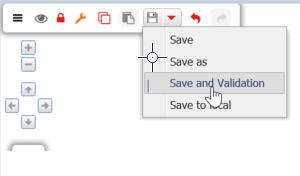
After configure the seat map, it must be validated by the system in order to use ist in a physical configuration.