SecuTix Gravity Team is thrilled to release the Newsletter Widget as one of our first widgets! The Newsletter Widget is nothing but a simple code snippet which you can easily integrate into a website. In the past, your online customers could only subscribe to your newsletter via the SecuTix online sales platform by either creating an account or purchasing as a guest. With this widget, potential customers could subscribe to your newsletter from any website that has the widget embedded. This flexible, highly customisable and easy to integrate widget could help you increase your newsletter's online exposure to a great extent.
Please note that this article only applies to SecuTix Gravity Newsletter Widget V1 which is released within PizBernina V2.
How does it work?
To use a newsletter widget, you first need to integrate a code snippet into your target website. You may either contact your web agency to embed the snippet into your website's HTML code or integrate it via Google Tag Manager. The code snippet will first call the SecuTix back-end service to fetch the necessary configurations (e.g. theme and labels) and then render the user interface of the widget based on the configuration. You can put the widget anywhere in your website, e.g. inside a pop-up, inside the footer or on the secondary column of your website, to name a few. The user interface of this widget contains a simple form with various fields (e.g. email address, title, first name and last name) and a submit button. Its default style and theme are the same as the ones from the corresponding online sales platform.
Once your online customers fill in the necessary information inside the widget and click the submit button, the newsletter widget will call the SecuTix back-end service to check whether an account already exists with the given email address. If not, a new account will be created inside SecuTix with the user information provided and from then any future newsletters will be sent to the given email address. If the email is already in use, the newsletter widget will display an error message and a link which points to the login page of the corresponding online sales platform.
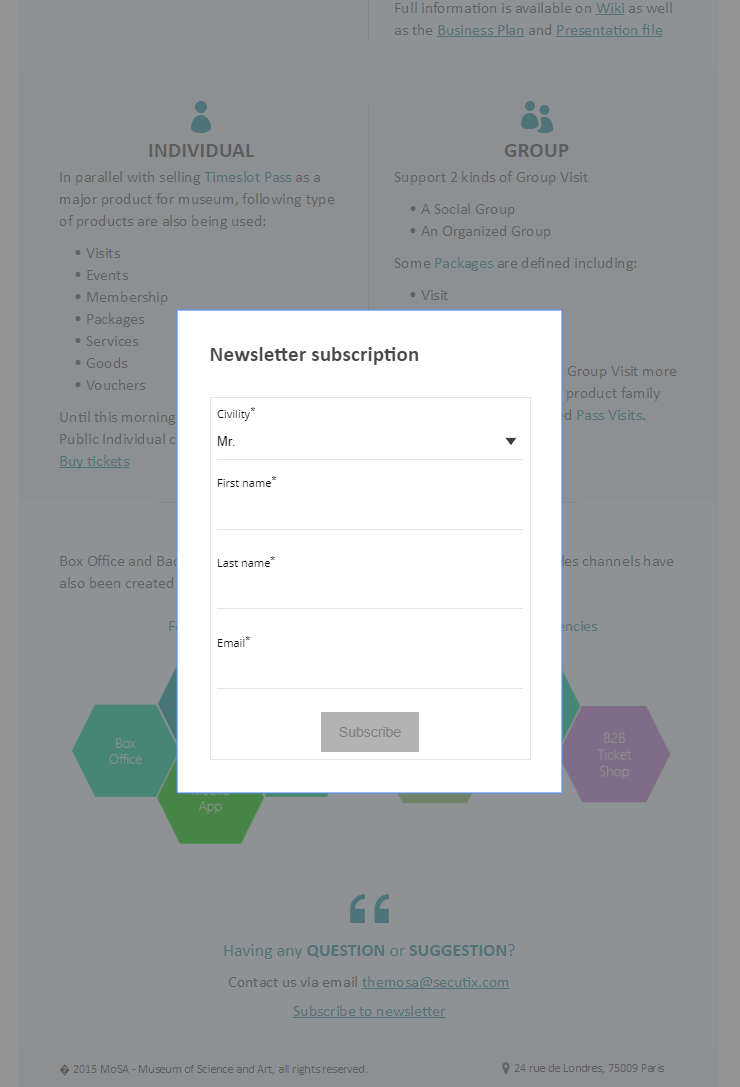
Example
Below is an example of the newsletter widget integrated as a pop-up inside the demo site.
Sample code snippet
<div id="stx-newsletter"></div>
<script type="text/javascript" src="https://INSTIT_CODE.widgets.secutix.com/stx-widgets/Newsletter/v1/Newsletter.js"></script>
<script type="text/javascript">
    STX.config({apiKey:"8bafa660-8bc1-4982-83da-f15fce01f4ec", hostname:"hostname of your online sales platform"});
    STX.widgets.Newsletter.render({props:{activeFields: ['civility', 'firstName', 'lastName']}, locale: "fr", root:"#stx-newsletter"});
</script>
Where the INSTIT_CODE values is the code of your institution.
Parameters
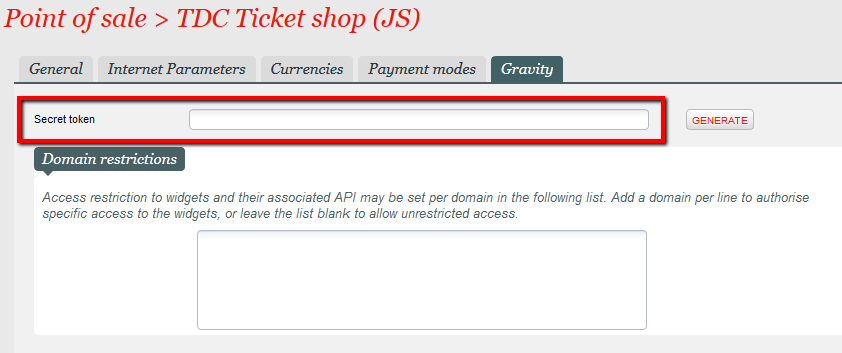
apiKey - the secret token generated in your point of sale configuration screen. You will find this parameter in the Sales Channels > Point of sales > Characteristics > Gravity tab.
hostname - the hostname of the point of sale URL for your online sales platform.
Please note that the newsletter widget will fetch the configuration (e.g. theme and labels) from the corresponding point of sale.
activeFields - (Optional) an array where you can specify which fields you want to display in your newsletter widget. Supported fields are 'civility', 'firstName' and 'lastName'.
Please note that an email field is always displayed regardless of the activeFields values.
- locale - (Optional) the language code which defines the language of the newsletter widget. When not set, the widget will use the main institution language by default.
By default, the widget submits the default criterion code “NEWSLET”, and default authorization code “CNIL_O”, but it is possible to configure it to send custom criterion and authorization code by putting this parameters:
criteriaFields: [
{
criterionIdCode: 'NEWSLET2',
defaultValue: [true]
}
],
authorizationFields: [
{
authorizationCode: 'OTHER_CNIL_O',
defaultValue: true
}
]
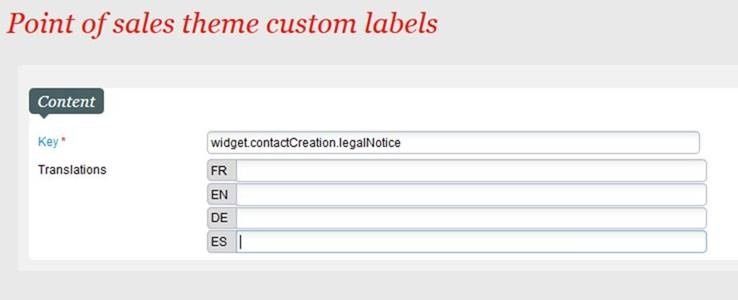
Legal mention
If you would like to display a legal disclaimer inside the newsletter widget, you can do so by using the label overriding mechanism from the light customisation screen in the corresponding online sales platform's point of sale.