This guide describes step-by-step how to migrate to the Google Analytics Enhanced E-commerce Tracking from the traditional E-commerce tracking, a new feature that SecuTix supports in Whymper V2. We recommend migrating your Google Analytics E-commerce today to take advantage of the new key features.
Prerequisite
Please note that our Enhanced E-commerce Tracking is only supported if you are using Universal Analytics tracking and Google Tag Manager.
1. Activate Enhanced E-commerce for the Point of Sales
Login to your SecuTix back-office, and activate enhanced e-commerce for the corresponding Internet point of sales via the screen Organisation > Initialisation > Organisation Parameters > Sales Channels > Point of Sale > Internet Parameters.
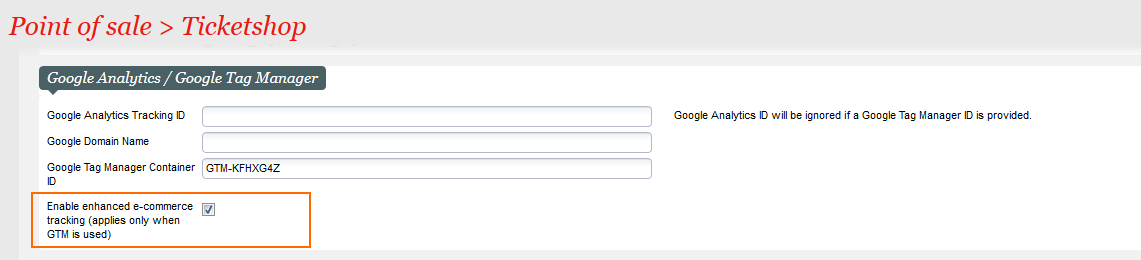
Wait for a few minutes for the corresponding PoS to be updated with the latest parameters.
Verification
Once the PoS parameter is successfully updated, you could verify whether your activation works by doing a test purchase.
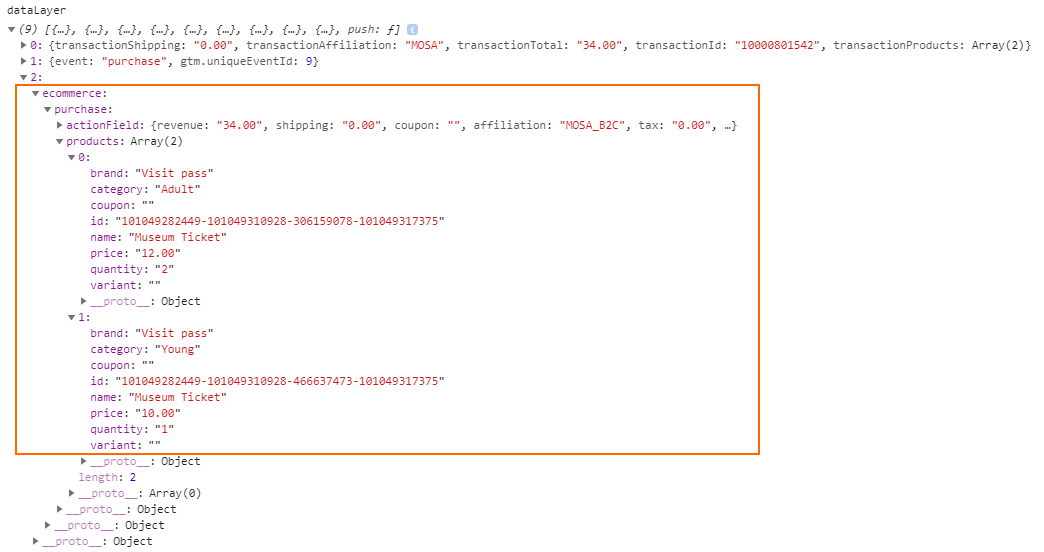
When you reach the Confirmation Page of your test purchase, do the following:
- press the "F12" key to open the Console (or right click the mouse and choose "Inspect Element")
- type "dataLayer" in the Console and press the "Enter" key
- if you can find the JavaScript object called "ecommerce" inside the dataLayer object (as highlighted below), then that means the activation step works.
2. Activate Enhanced E-commerce in Google Analytics
- Login to your Google Analytics account
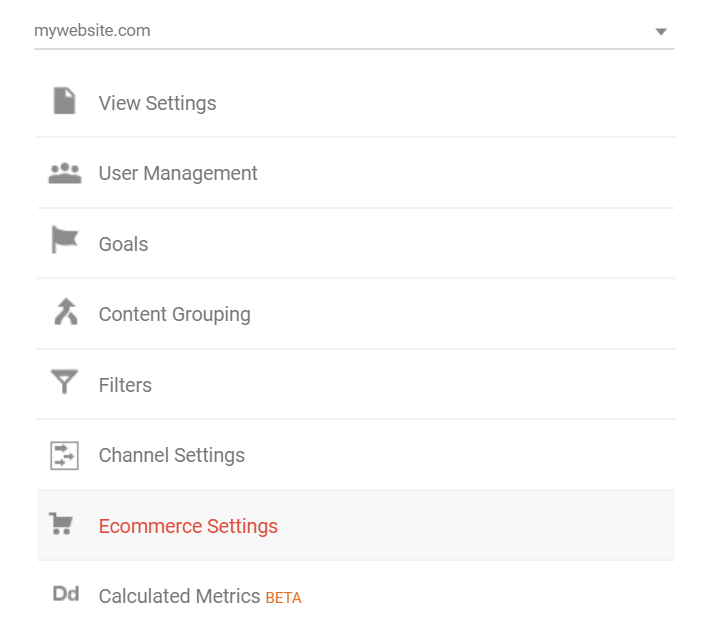
- Go to the Admin page
- Find the corresponding "View" where your online ticket shop is configured to send the tracking data
- Click on the "Ecommerce Settings"
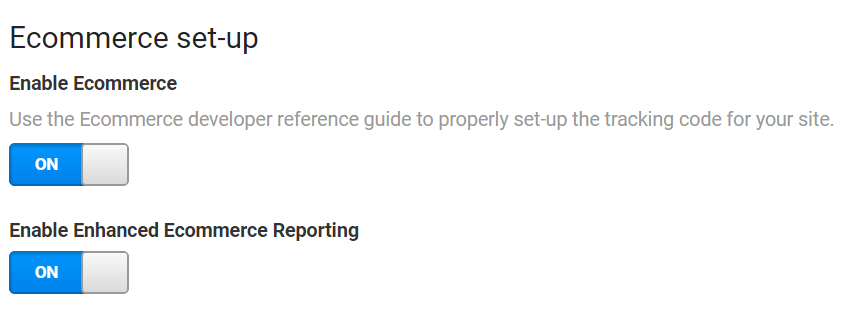
Activate the Enhanced Ecommerce Reporting
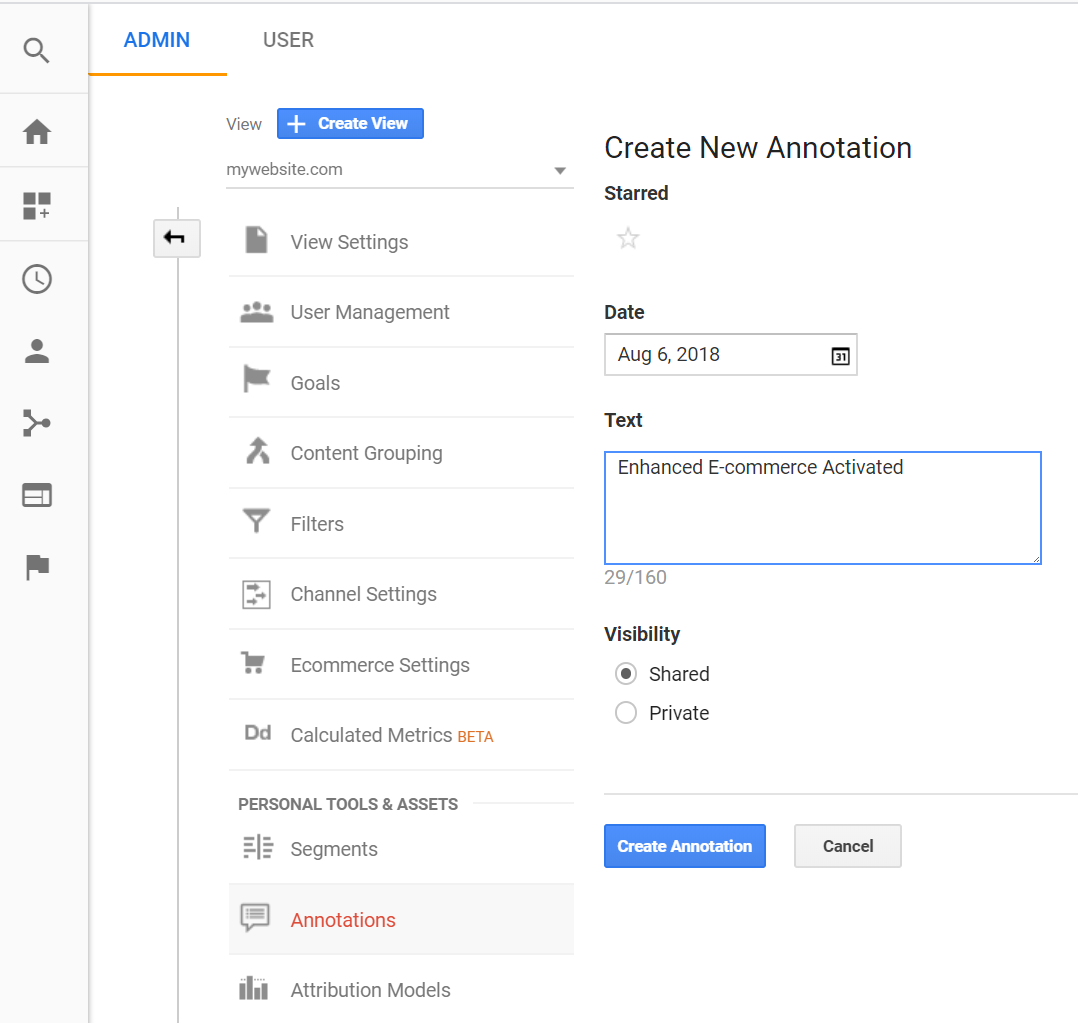
- Add a new Annotation to mark the date when you activate enhanced e-commerce
3. Setup Google Tag Manager
Once you have activated the enhanced e-commerce tracking at the dataLayer level and inside Google Analytics, the final step is to configure the tags properly in your associated Google Tag Manager account.
3.1 Deactivate The Existing Traditional E-commerce Tag
Please note that this is an important step. If you couldn't configure it properly, you might end up having duplicated transactions in your Google Analytics reports.
To successfully migrate to the Enhanced E-commerce, first we need to deactivate the existing traditional e-commerce tag.
- Login to your Google Tag Manager account
- Open the Tag where you configured the traditional e-commerce tracking
- On the top-right corner, click on "Pause" via the options menu to pause the tag
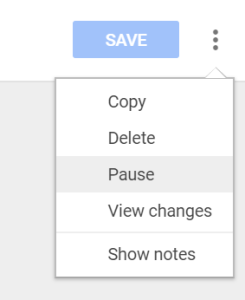
- Click "Save" to save the changes
3.2 Enable Enhanced E-commerce
The second step is to enable enhanced e-commerce tracking inside your existing Universal Analytics basic tracking tag.
- Open the Tag where you configured the Universal Analytics basic tracking
- Open the "More Settings" > "Ecommerce" option and check both checkboxes as shown below
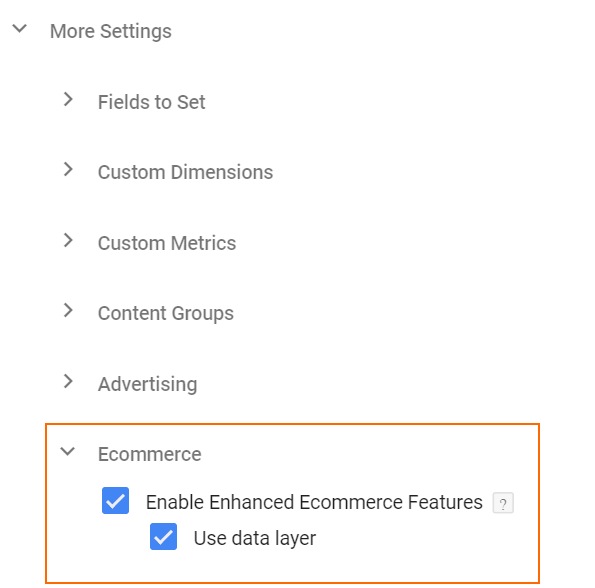
- Click "Save" to save the changes
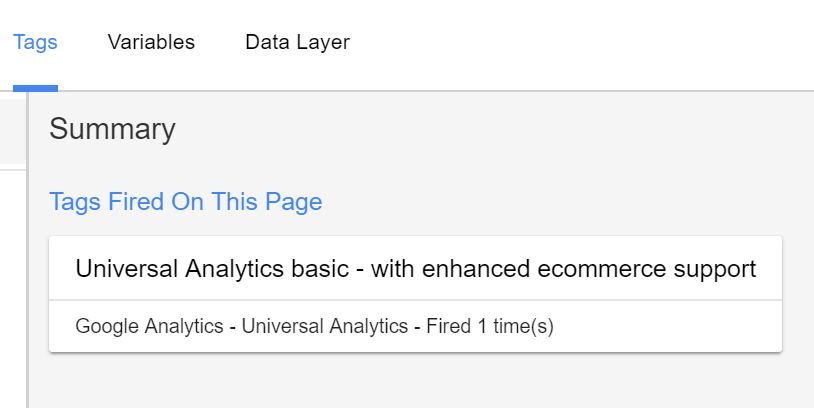
3.3 Preview & Publish
- Click on the "Preview" button at the top right corner

- Inside the same browser, open your target online ticket shop in a new tab
- Do a test purchase
- On the Confirmation Page:
- note down the Reference ID (i.e. File ID) for this transaction displayed in the thank you message
- verify that there is only one e-commerce tag fired (as shown in the example screenshot below)
- Go to the corresponding Google Analytics account
- Click on Conversions > Ecommerce > Sales Performance report and change the date range to the current date
- Wait for a few minutes and keep refreshing the page until you see the Reference ID of your test purchase appears in the Sales Performance report
- Go back to the Google Tag Manager account
- Click on "Submit" button to publish your GTM container if the above steps are verified to be correct
- Done!