...
Such a process has advantages in terms of flexibility, but consequently requires a more complex handling of seat quotas, which must be determined twice, once at an abstract level independently of the seat map, and once on the seat map itself. There is an additional effort to be planned to ensure the consistency of these quotas, and a careful decision should be made before making use of the functionalities described below.
0. Preparation
1. Contingents
2. Logical configurations
3. Performance / match setup
4. Sales
5. Seating
6. Access control
Setup
| Anchor | ||||
|---|---|---|---|---|
|
Initial setup of this process must be done by SecuTix, as explained in "How to activate the different option modes or post-seating?". Please liaise with your Customer Success Manager.
| Anchor | ||||
|---|---|---|---|---|
|
To implement such a process, the first step is to create, in Institution | Initialisation | Contingents, a contingent of type = “Target group”, as below. A “Target group” is the top of a hierarchy of smaller “Sub-target groups”, which will be associated later with sales quotas for every match.
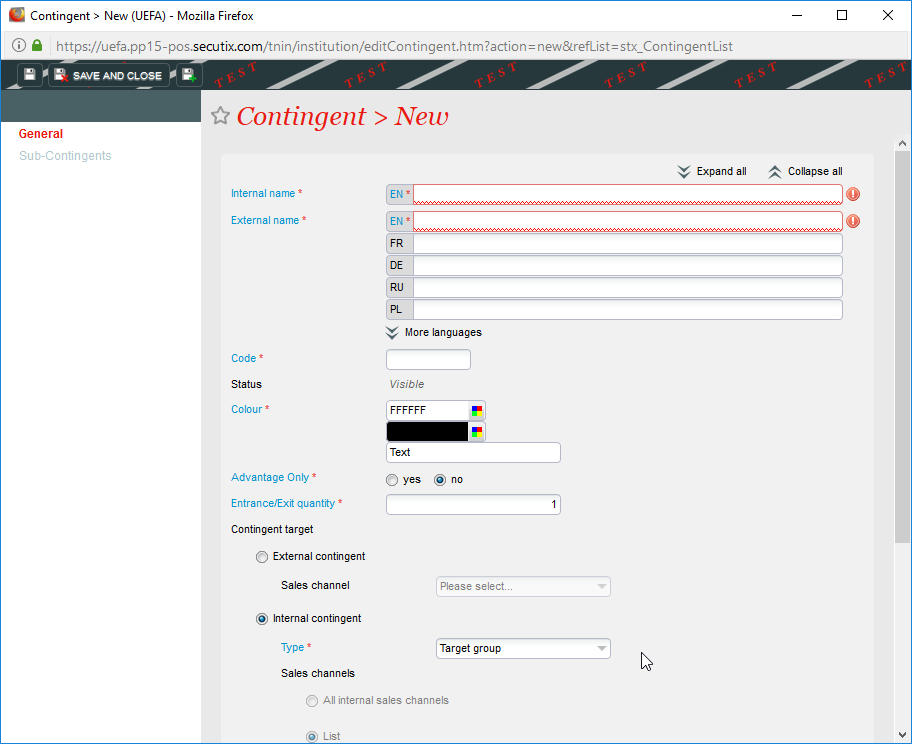
There can be several target groups created, each corresponding to a broad set of customers, such as “General public”, “Commercial partners”, “VIPs”, etc…
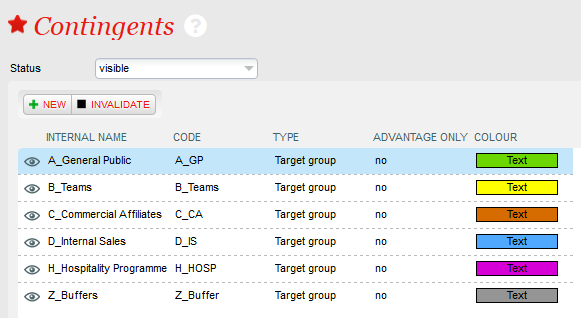
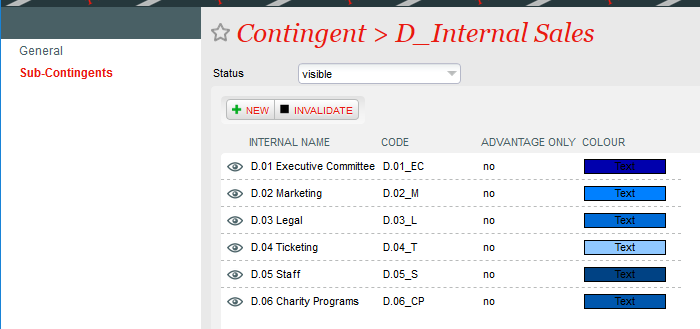
Once the “Target group“ is created, a set of sub-contingents, also known as sub-target groups, should be created inside the target group. The sub-contingents created should cover all possible use cases, even if there won’t be any quotas for them on some events.
| Anchor | ||||
|---|---|---|---|---|
|
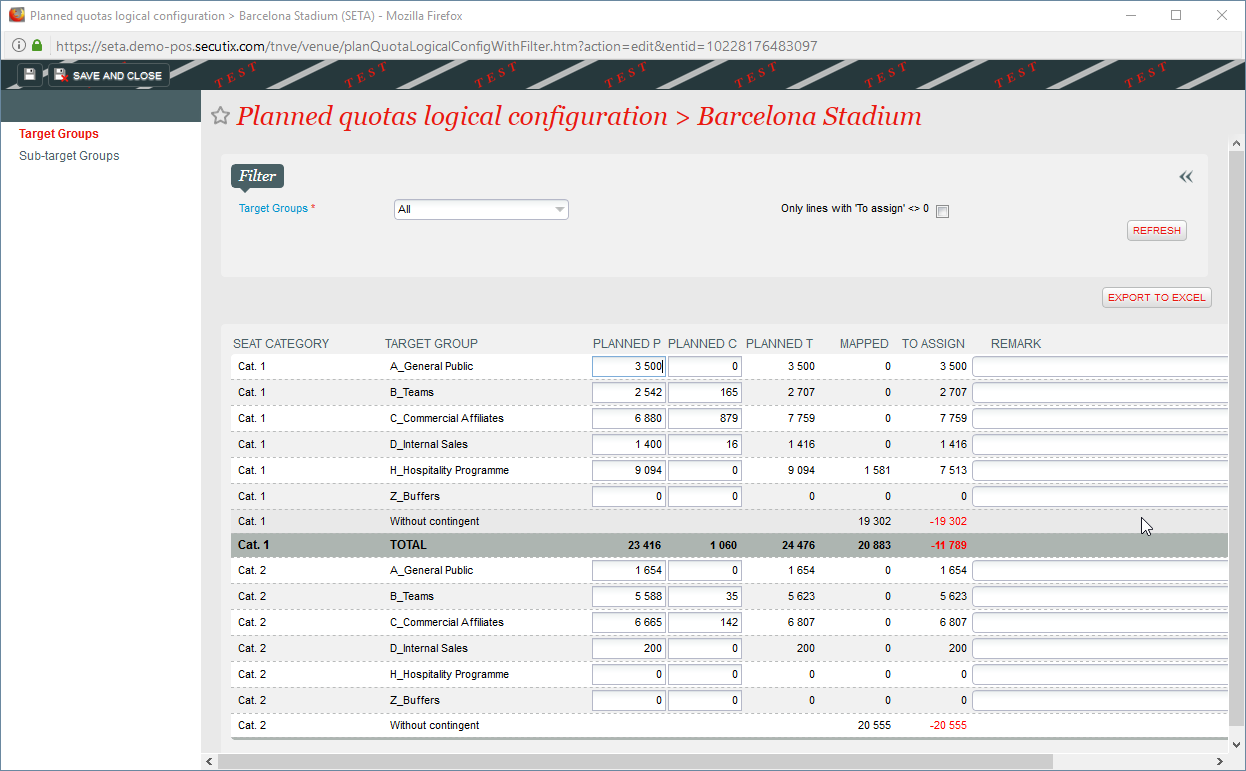
On a logical configuration, it is then possible to define planned quotas for a selection of target groups and sub-target groups. There are two levels of quotas, both at target group and at sub-target group levels.
...
- Target groups: Allows the planned quotas to be defined for each target group and seat category.
- Sub-target groups > Pre-seating view: Allows the planned quotas to be defined for each sub-target group and seat category, and consistency checked with target group level.

Once planned quotas have been defined on one logical configuration, they can be copied to another one, also partially, through the “Change Planned quotas” button in the Organisation | Venue | Logical Configurations screen.
...
If planned quotas are defined, the system will prevent sales from going above the planned quota, which becomes a hard limit for sales inside a sub-target group and category, independently of the number of seats assigned on the map. Therefore, if additional seats on the map are added to a contingent, the planned quotas should also be raised.
| Anchor | ||||
|---|---|---|---|---|
|
When a performance or a match is validated, similarly to the handling of seat maps, the planned quotas defined in the logical configuration are duplicated into new values that are associated with the specific performance or match, and are then administered at the performance or match level, instead of within the logical configuration.
In the Organisation | Catalogue | Performance / Match screen, using the “Planned quotas” screen, it is possible to see and update the planned quotas for a specific performance / match.
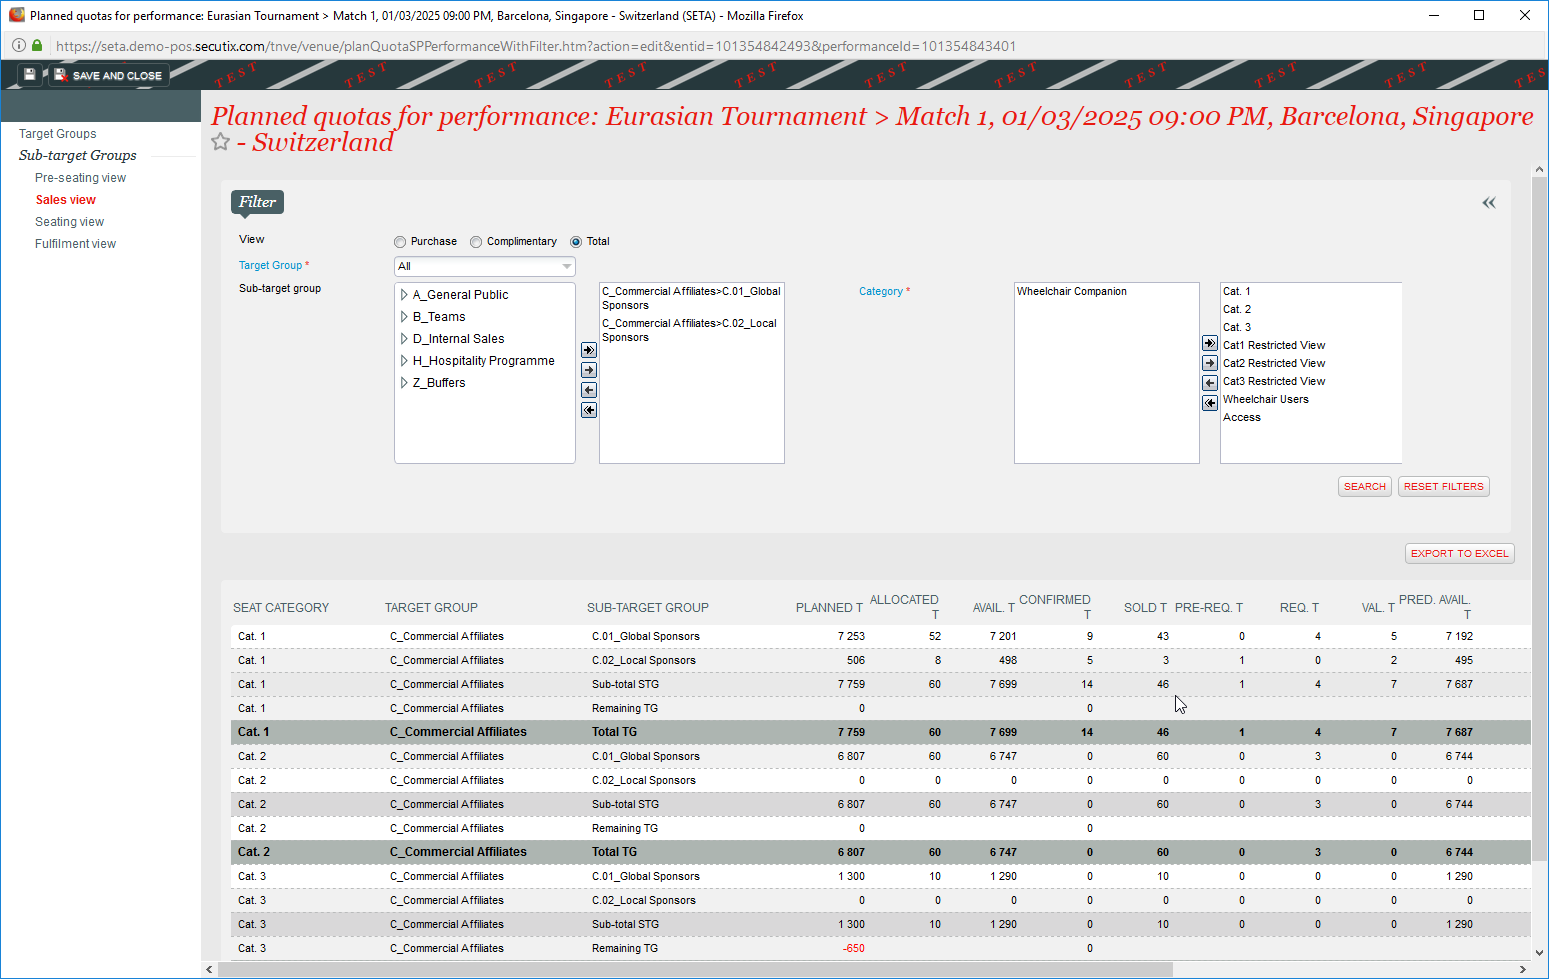
Inside the planned quotas screen, there are various sub-menus:
...
If necessary, it is possible to copy again the planned quotas from the logical configuration to the performance / match, in the Organisation | Catalogue | Performance / Match screen, using the “Change Planned quotas” screen. Is it also possible to copy only the quotas from one target group.
Operation
| Anchor | ||||
|---|---|---|---|---|
|
When using planned quotas, both front-office and back-office sales can be conducted without assigning any seats to the reservations or the sales.
To set this up, a front-office portal should have the appropriate parameter set in the sales channel. To go Institution | Initialisation | Sales Channels, open a front-office sales channels (of type “Internet B2C” or “Internet B2B”), and set the “Default seat selection mode” = “Without seating”, as shown below.
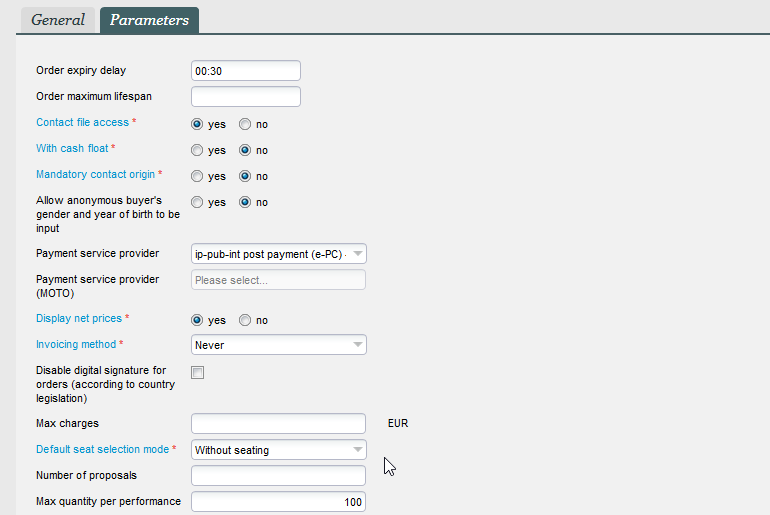
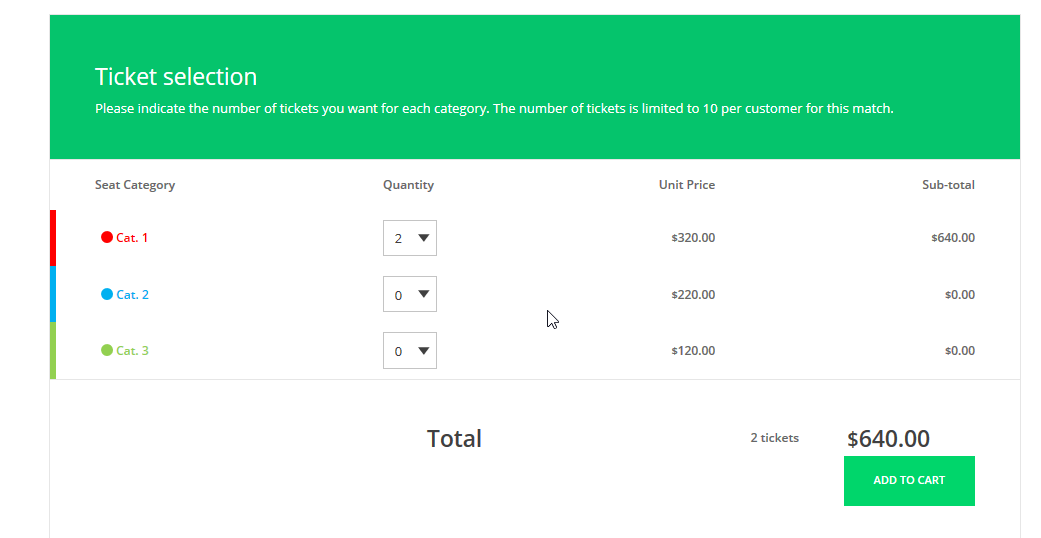
With this setup, customers on the front-office sales portal will be able to choose the number of seats required in each seat category (see below), but will not have any possibility to select areas or blocks, nor see any other information relating to their future seating, until this is decided later in the back-office.
It is possible to operate a resale platform before or after seating has been made. The display on the front-office portal is not controlled by the sales channel set-up, but by the nature of the tickets that are resold:
- If no resold tickets are seated, then the resale purchase process is identical to the standard unseated ticket purchase process, shown above: customers just select numbers of tickets from a big pool
- If all resold tickets are seated, the resale purchase process shows a seat map, and customers select groups of seats on a map.
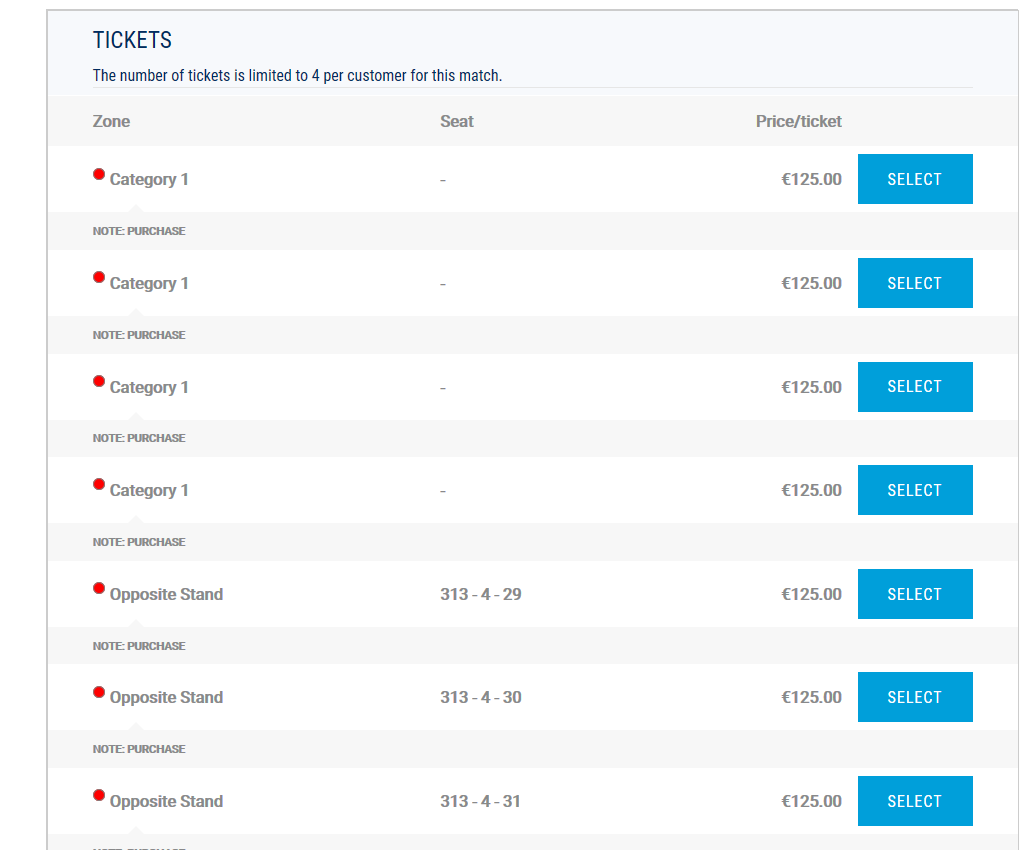
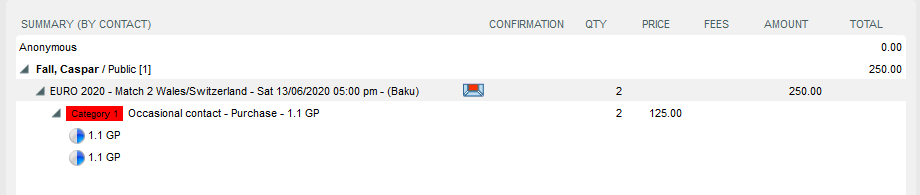
- If some tickets are seated and others not, the resale platform is still functional, but the display might be confusing for customers, and this is not recommended. The display is shown below:
In the back-office, reservations and sales can be made with or without seating, independently of any setup parameters. It is not possible to prevent operators from making seated or unseated sales.
To make an unseated sale in the back-office, once the relevant performance / match, seat category, sub-target group (contingent) and tariff have been selected in the temporary cart, the “without seating” option, shown below, should be selected.
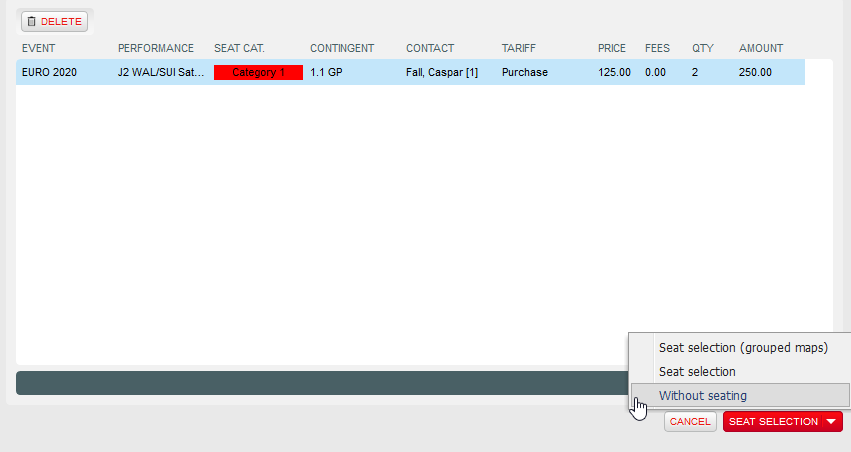
Tickets are then placed immediately in the cart, without any seat details:
A shipment mode and a payment method are then selected, as usual, to complete the sale. All usual rules about acceptable shipment methods apply. All payment methods can be used.
Unseated files can be processed in the back-office like normal ones, in order to make exchanges, cancellations, payment of reservations, or cancellation of reservations.
| Anchor | ||||
|---|---|---|---|---|
|
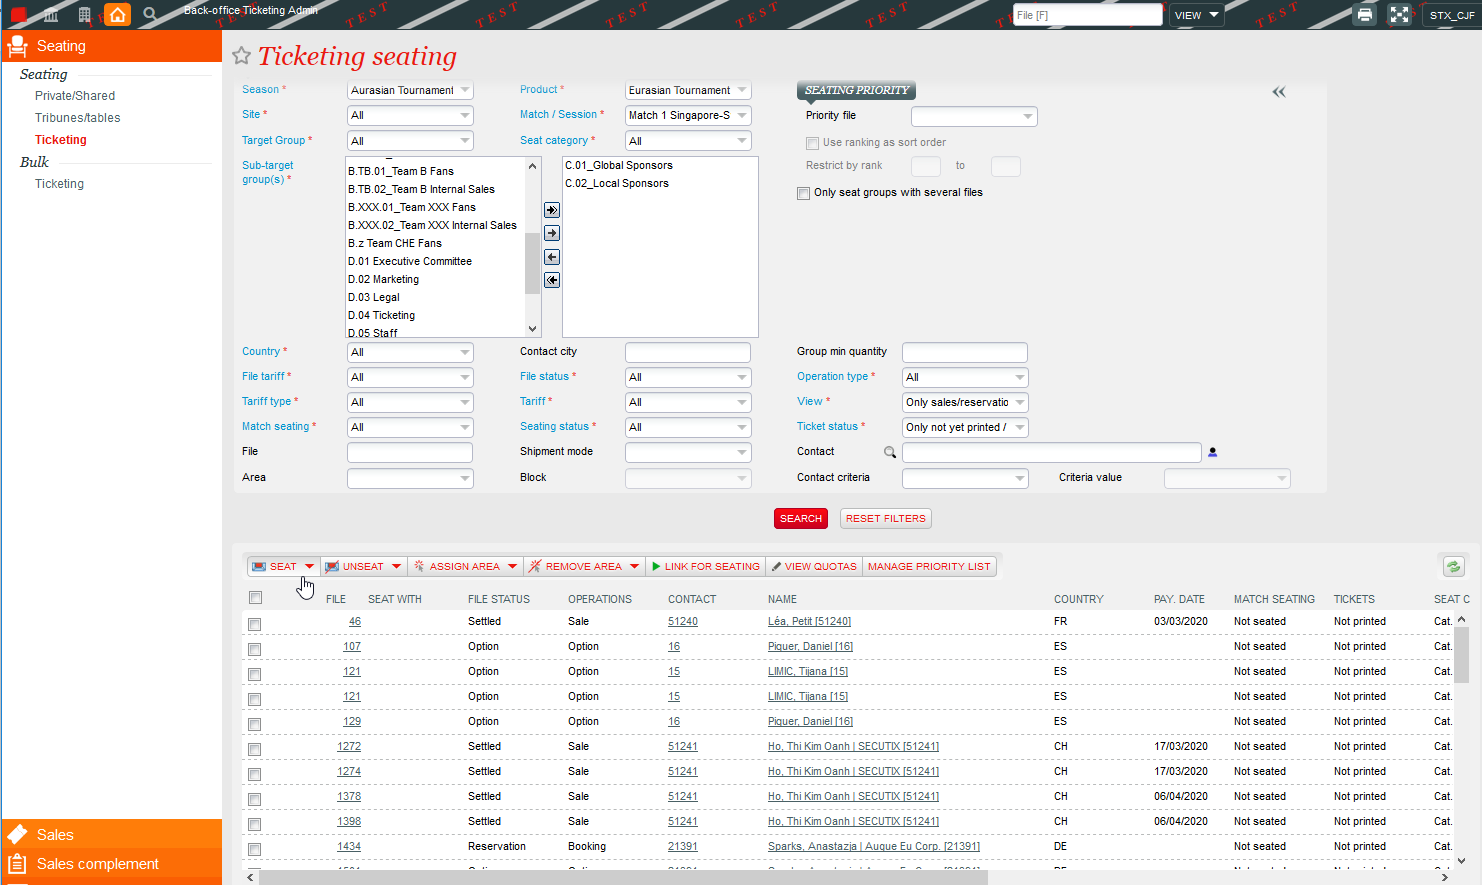
A dedicated module is provided in the sales context to perform all seating operations. The screen Sales | Seating | Ticketing is the main way to assign seats to unseated files.
The seating process is always performed for a single performance / match at a time, and consists of:
- Selecting a performance / match and a set of operations to seat, through various search filters (file status, category, target-group, sub-target group, tariff, contact, country of buyer, etc…)
- Manually choosing the seats on the seat map for the selected files, or asking the system to perform automated seating on them, using the standard seating algorithm. The system is designed to allow thousands of tickets to be seated automatically simultaneously, in a single step.
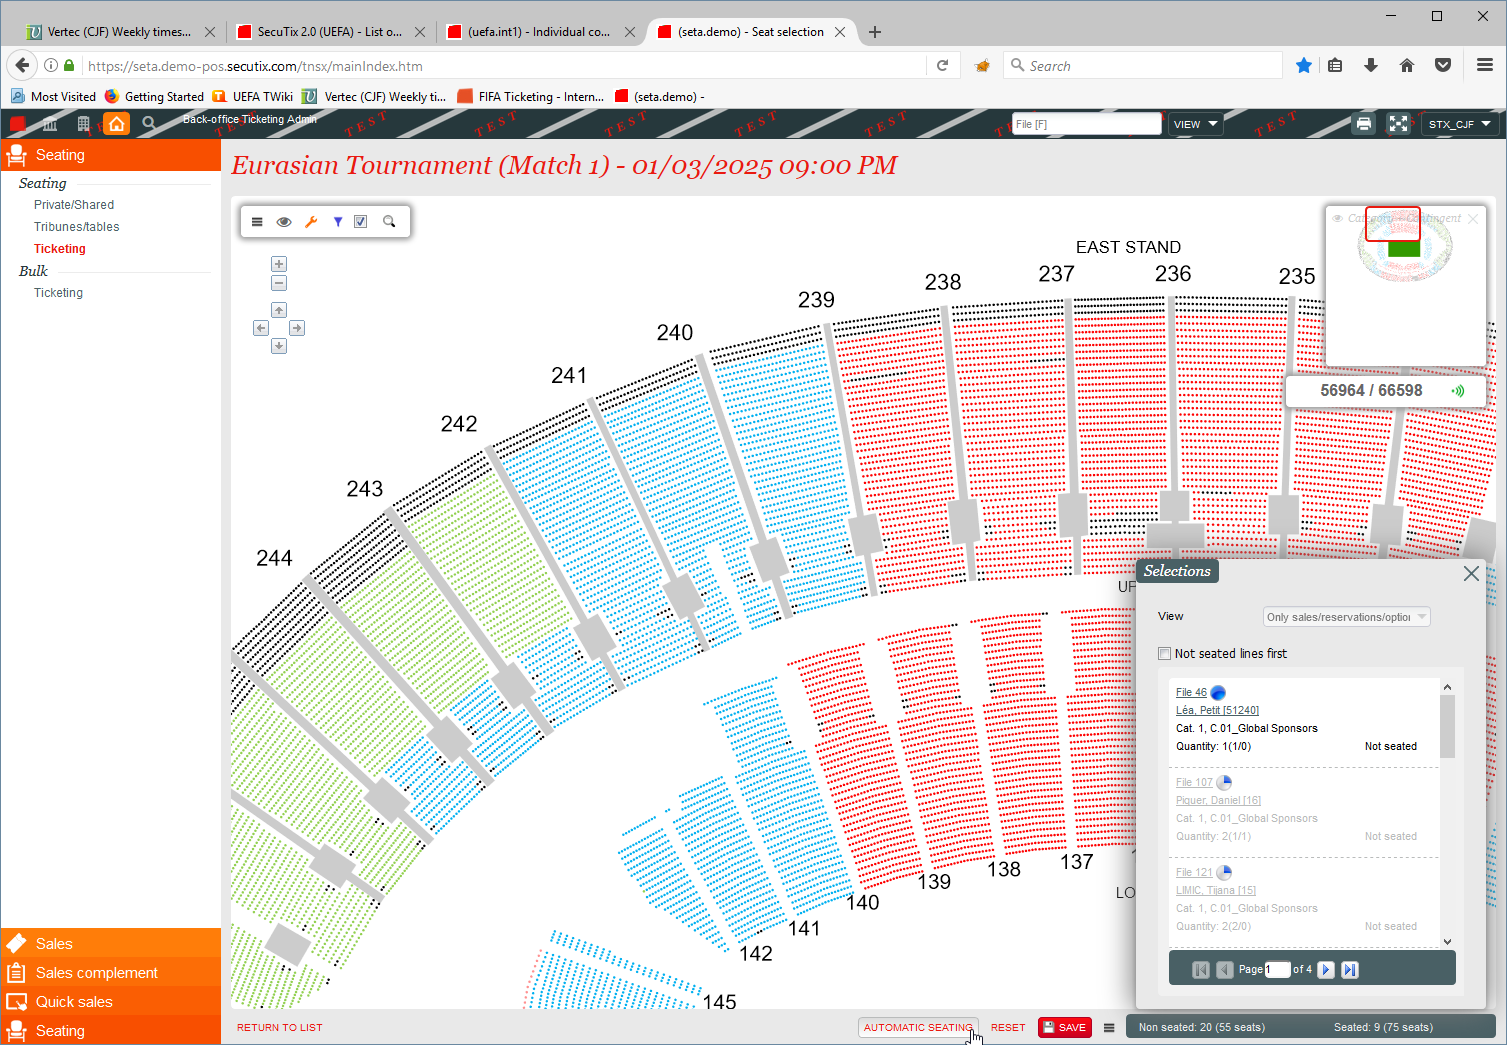
The system will allow reservations and/or sales to be seated.
Seating of tickets sold in a given sub-target group is only possible on the seats associated with the same sub-target group, provided there is at least one seat mapped to that sub-target group on the current performance / match. If there are no seats mapped to that sub-target group then sales can be seated on seats in the parent target group.
This is designed to facilitate the seating process:
- Either mapped seats are handled as big pot for the target-group as a whole, and they can be used for any sub-target group sale (this might be used for general public, for instance);
- Or seats are mapped individually to each sub-target group, and then seating proceeds individually in each pot (this might be used for internal sales / VIPs).
The same process applies to seating in configurations without a seat map. In this case, the seating process consists of assigning areas to files.
...
Once seats have been attributed to a file, they become visible on the front-office portals for customers, in the file details and in the list of tickets.
| Anchor | ||||
|---|---|---|---|---|
|
Unseated files already have tickets associated to them, and barcodes are already attributed, even though the seating is not yet defined. Therefore, such tickets should generally not be exported to any access control system, until the seating is finished.
To ensure such a restriction, there is a parameter that must be set (by SecuTix only) in the institution parameters, shown below:

This configuration will ensure that only PRINTED ticket are exported to the access control system. Once a ticket is printed, its seating details cannot be changed, so it is safe to send it to the access control provider.
This parameter is then used with all access control interfaces (SecuTix API for access control, Skidata Handshake, Orange StadAccess, …).
TBD – does with works with TnAC?This parameter is not used with SecuTix Access Control (TnAC), since TnAC decrypts the information encoded in the barcode and doesn't import any barcode from SecuTix.
Next steps
Once you have a performance / match using sub-target groups and planned quotas, this opens the door to a sophisticated B2B sales process, using options, that can be used to facilitate the administration of events with over-demand. This will be the subject of a separate documentation.
...