| Excerpt |
|---|
Manage my bookings feature (or online self-exchange) supports now exchanging against any products or adding any products of the catalog available for sales on the corresponding sales channel. The feature is available on online sales channels and on the mobile operator. |
We have recently introduced new features empowering your customers to self-manage their bookings online and on the mobile operator. This release extends this feature to let your users exchange their original tickets to any other products. They will be able to exchange their tickets for match/event A to tickets for match/event B, or from a standard visits to a top tier visit products. Your customers gain more freedom online, derive additional revenue from upgrades and fees, while reducing operational costs. Start using the function today to open the door to post-sales online upgrades.
Online self-exchange of products is a new feature that can be activated on your internet point-of-sales. On top of the already existing configurations, you can enable the change of products.
Exchanging products on the ticketshop
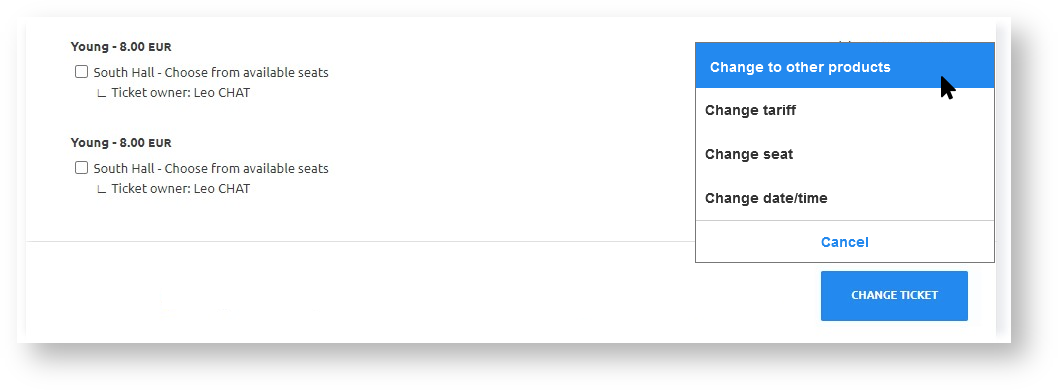
Change to other products option let user select another product
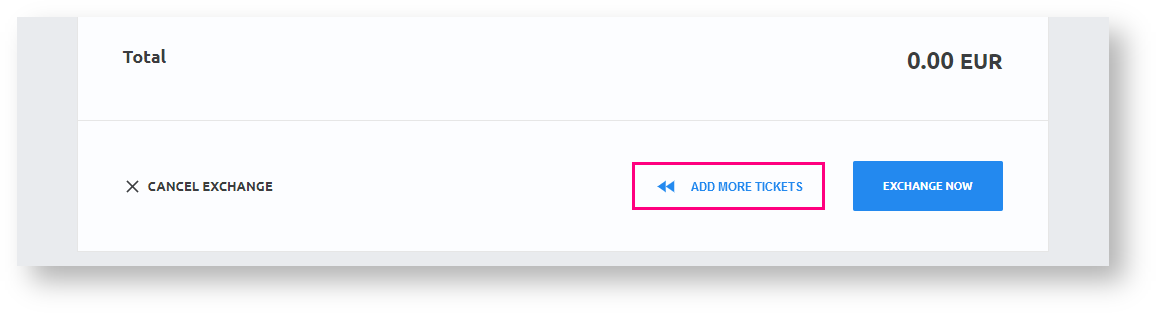
In the exchange process, you can always access the catalog of products to add more tickets to your exchange order
Exchanging products on the mobile operator
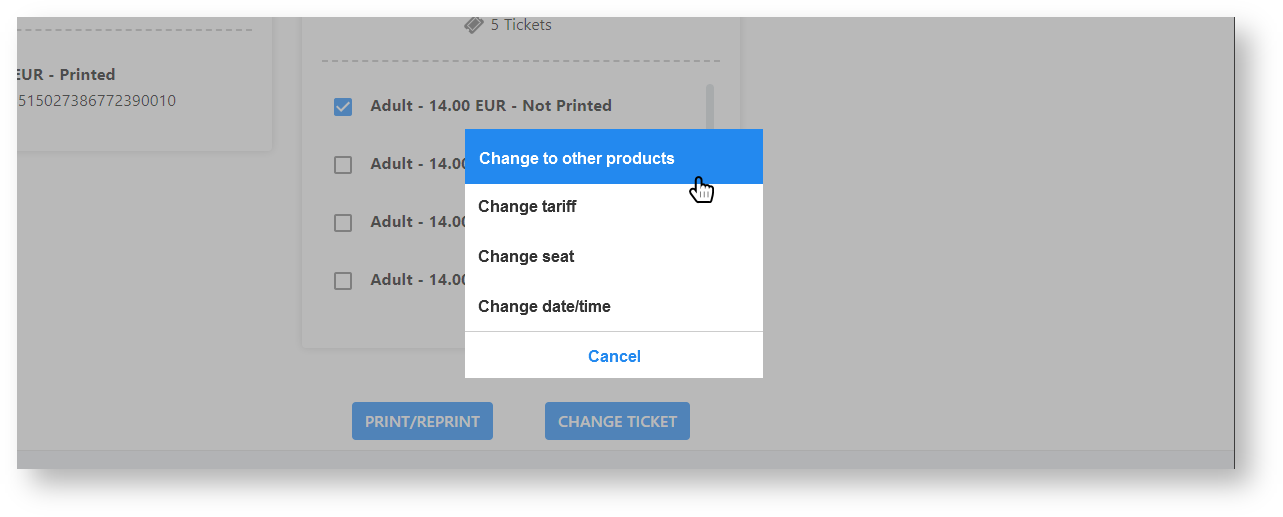
Operators working with mobile operator can select other products for the exchange by tapping on "Change to other products" option.

In the exchange process, operators working with the mobile operator can always access the catalog of products to add more tickets to the exchange order
Getting started
To enable the exchange of products feature :
- Go to the sales channel on which you want to enable the product exchange feature.
- Select a point of sales.
- Access the Internet parameter Tab.
- Enable the "change of products" option.
- Set the allowed exchange period (optional)

New configuration option in the Online exchange configuration section
Before starting with the content:
- Title should be concise, in the same style as the other title. Keep in mind that we are showing both the title and the excerpt below on the release note page - so no need to be too long. Always create the page first in the "Work in progress (not public)" page, "Sprint x -" prefix and inside one of the "component (WIP)" page. If you feel a component is missing, ask GTH.
- Put labels on the page, especially the ones used in the "Guide" section. This will make your release note show up in the Guide section of the website.
- Delete this instructions of course
Context
| Excerpt | ||||||||||||||||
|---|---|---|---|---|---|---|---|---|---|---|---|---|---|---|---|---|
Status should be
|
Solution
RECOMMENDED - Description in more details about what the feature is. Keep it more operator-oriented, not overly "marketing".
| Warning | ||
|---|---|---|
| ||
Communicate also in this section important limitations or information that the customer should not miss. |
| Info | ||
|---|---|---|
| ||
Use info box if you want to highlight a particular point. |
Getting started
MANDATORY - What is the setup required to use the feature (even if none, please mention)? Where can I see the feature? (this is intended to be a short guide). At least one screenshot should be provided, at latest for the finalized release note at sprint end.
Examples
...